|
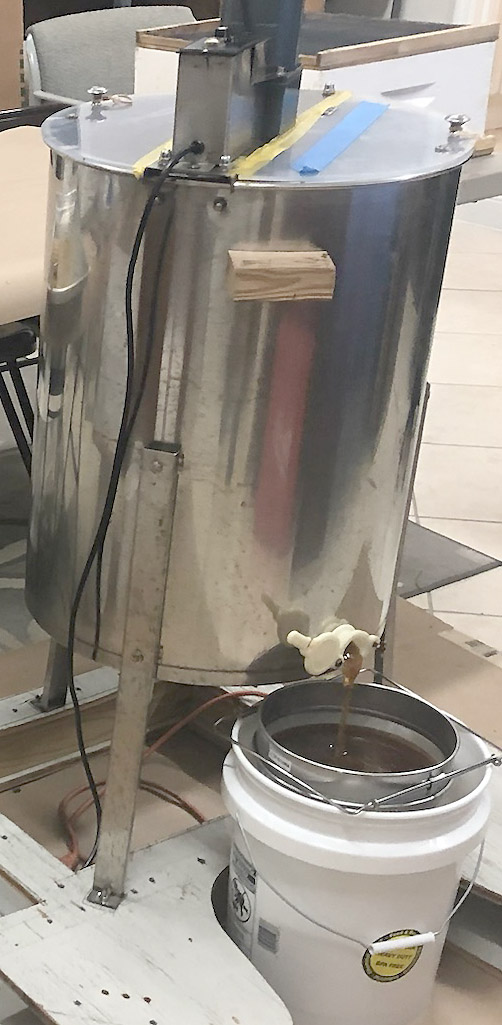
6/28/2022– Extractor Use in Honey Harvesting: A spinner extractor was used for this 420 pound honey harvest. This was the second use of the speed controlled 4 frame extractor, with it having been used for the first time on the 11/4/2021 honey harvest which came in at 490 pounds. It had become obvious that as the size of my honey harvests have increased over the years, that the move away from the honey press was necessary. When compared to the honey press, the spinner is less labor intensive and allows a faster harvesting from the frames. A heavy wood base was built to give a little better elevation and afford a firm mounting of the extractor. Overall, it is a good improvement in the honey harvesting process and will be used on all future honey harvests.
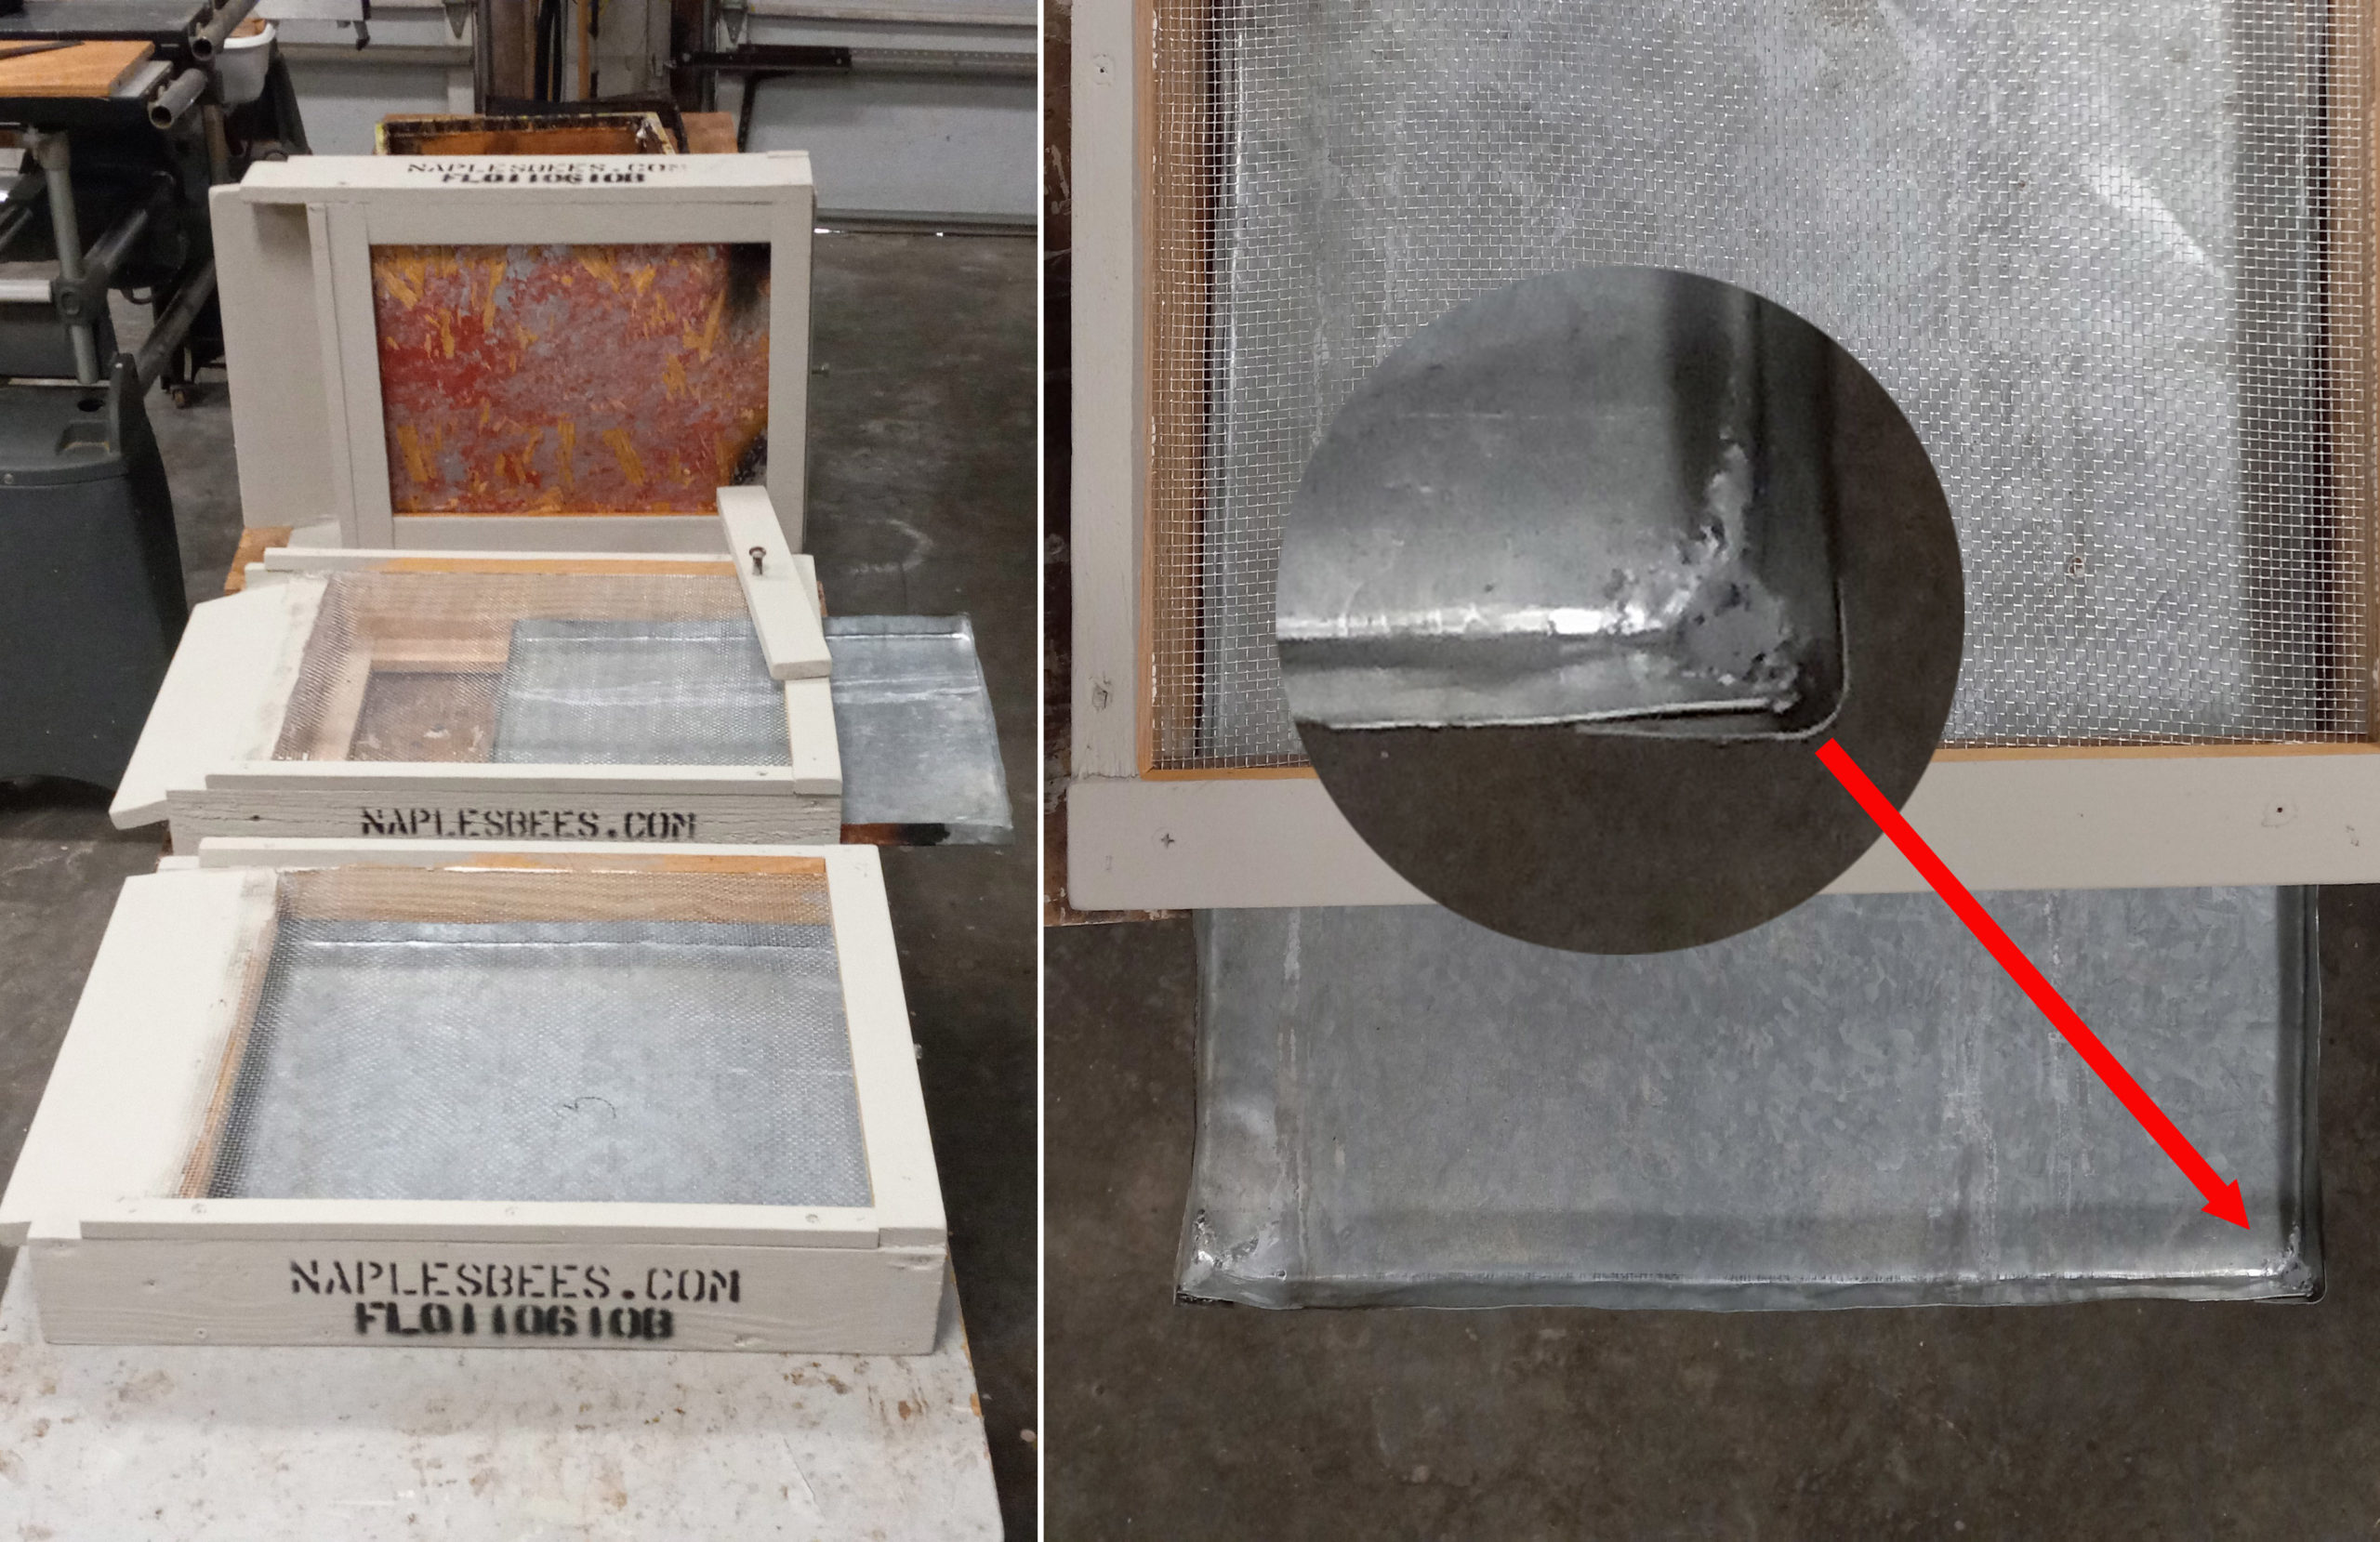
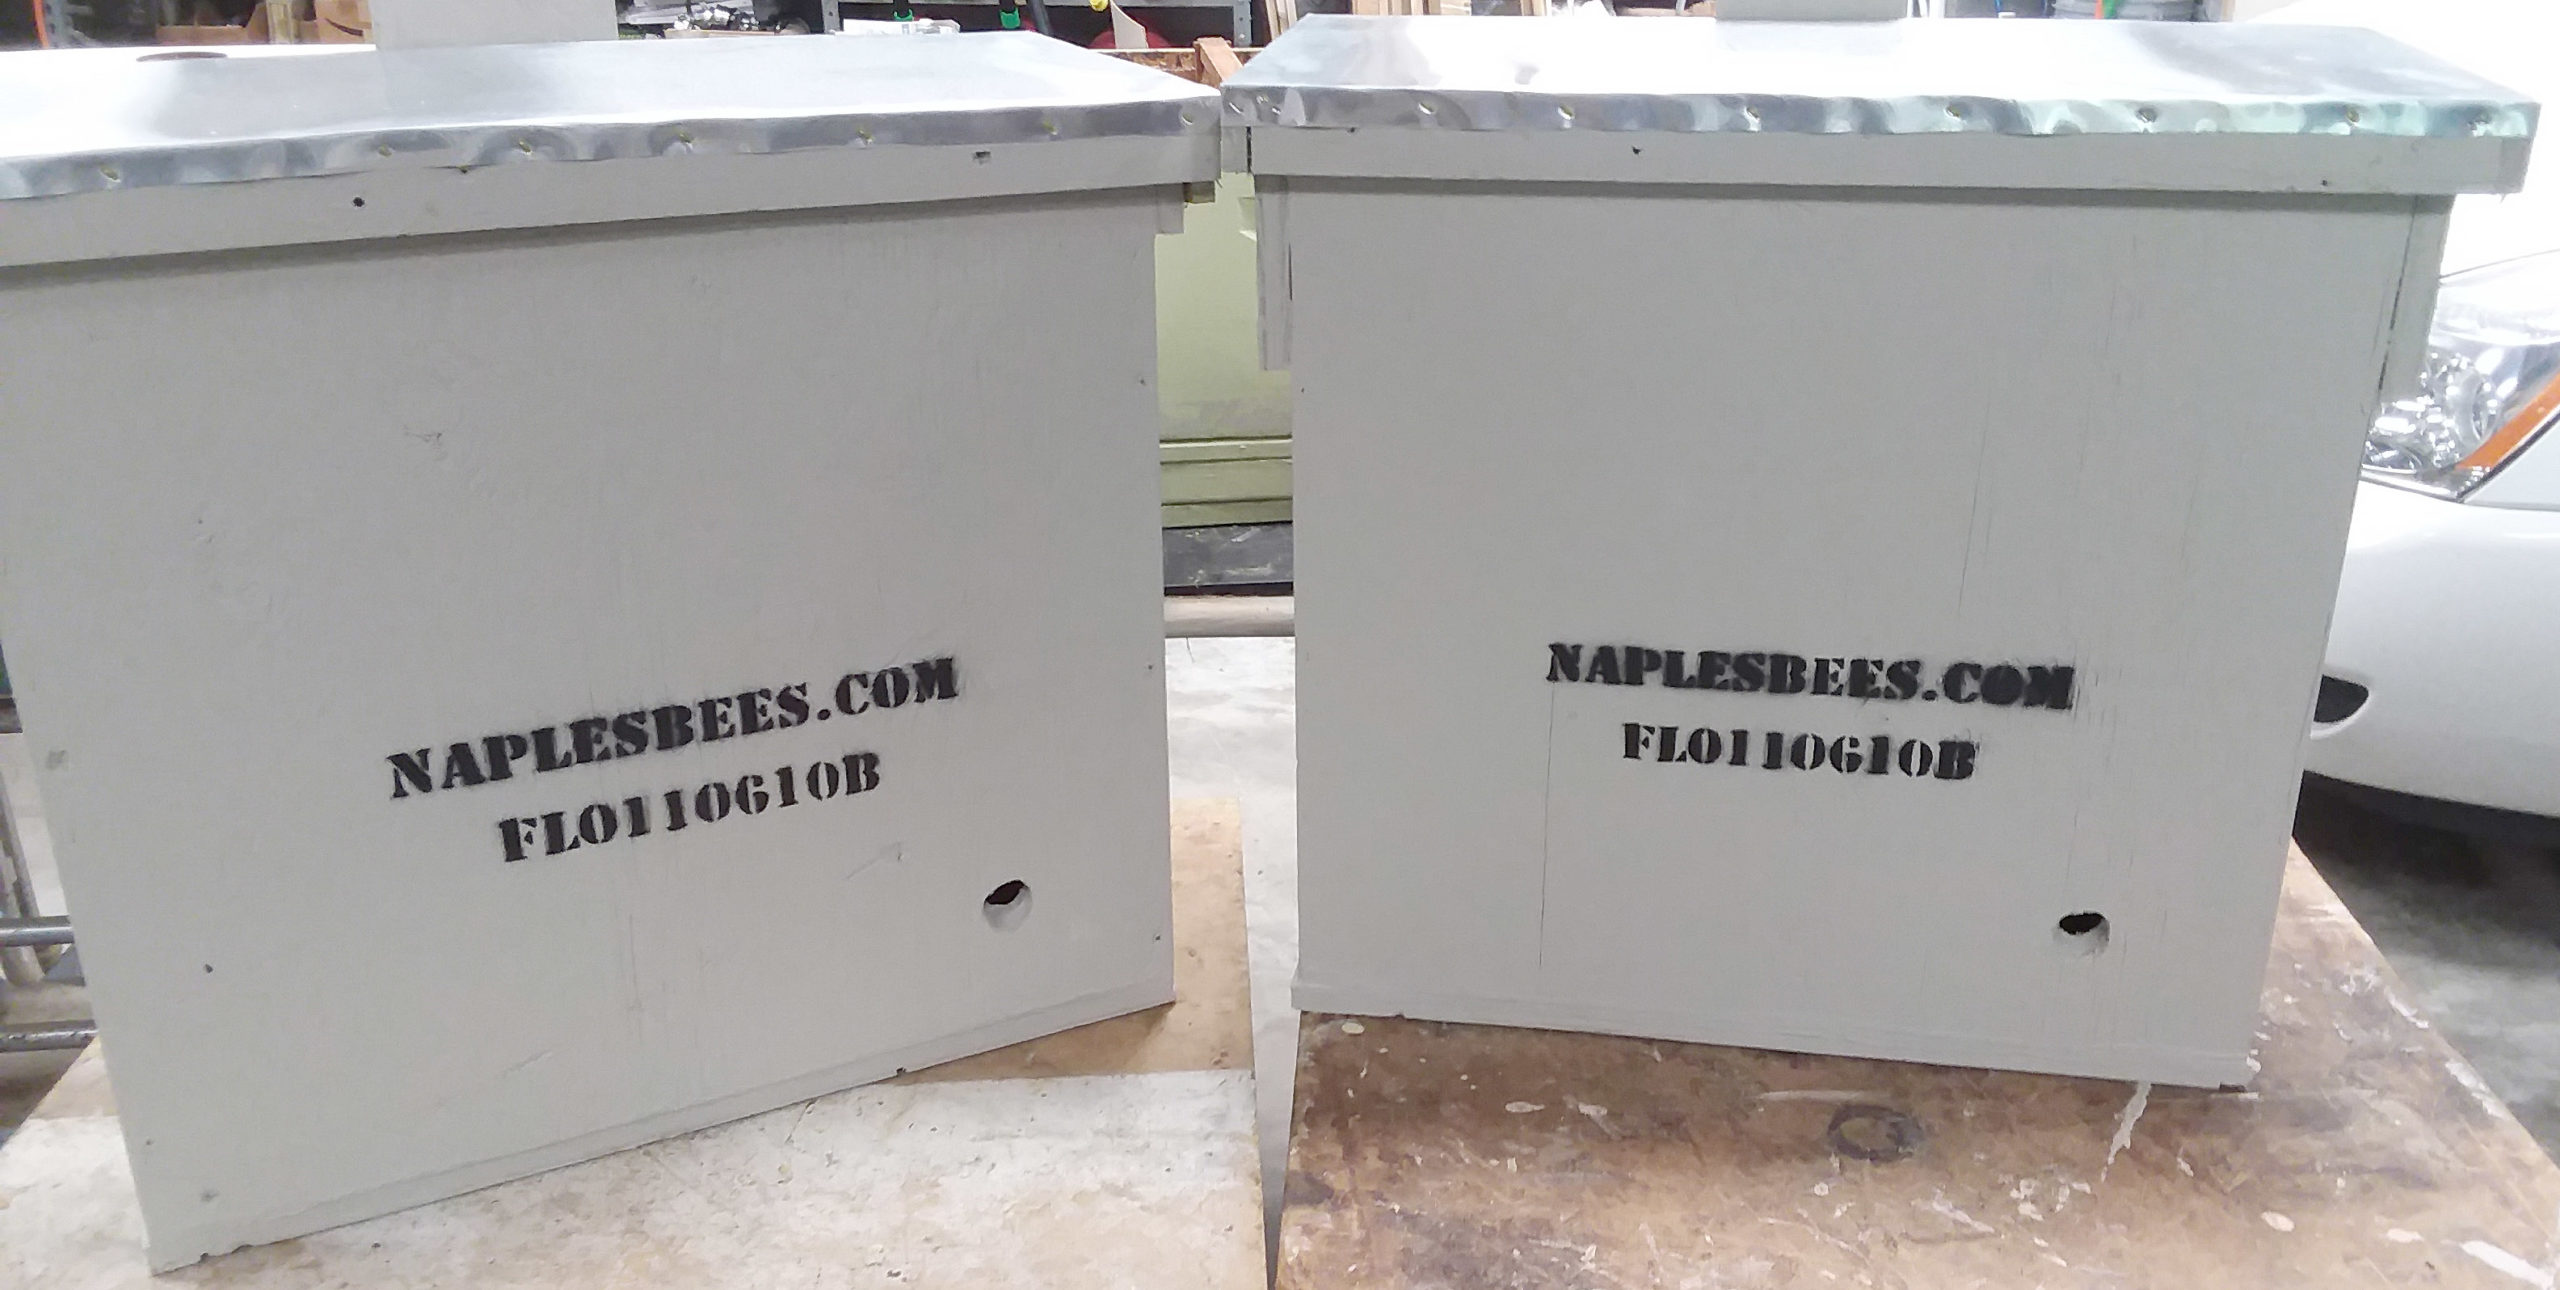
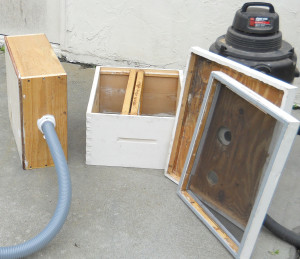
 Motorized extractor. Click picture for a larger view. 6/3/2022– New Bottom Boards Made: A few bottom boards were constructed. Like all the previously made bottom boards, they consist of a screen above a vegetable oil holding tray. The trays were made from 24 gauge galvanized steel sheet and the corners were welded leak tight with aluminum rod. These bottom boards offer some pest reduction in the hives.
 Click on picture for a larger view.
2/11/2021– Varroa Mite Treatment Tool: Hive treatment for varroa mites is necessary once or twice per year. My preferred method is to use a vapor based procedure with oxalic acid, which is a naturally-occurring compound in plants. To treat, I use a procedure with a vaporizer called a “gas-vap“. It is very effective and, after removing the supers for the treatment, I can treat 20 hives in a couple hours. Generally, 3 or 4 treatments are done at a 6-7 day interval in order to kill varroa that might be in capped brood cells.
10/29/2020– Swarm Trap Boxes: Using some scrap plywood laying around, a couple swarm trap boxes were constructed and will be hung up in a few trees around the apiary. They hold 5 brood size frames with a large space underneath the hanging frames. Supposedly, the extra space is an attraction to the scout bees. A rotary wheel opening was added to the opening in the finished product.
 Click on picture for a larger view. 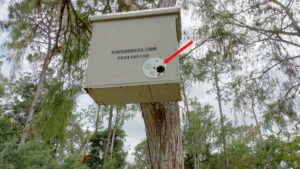 Click on picture for a larger view.
|
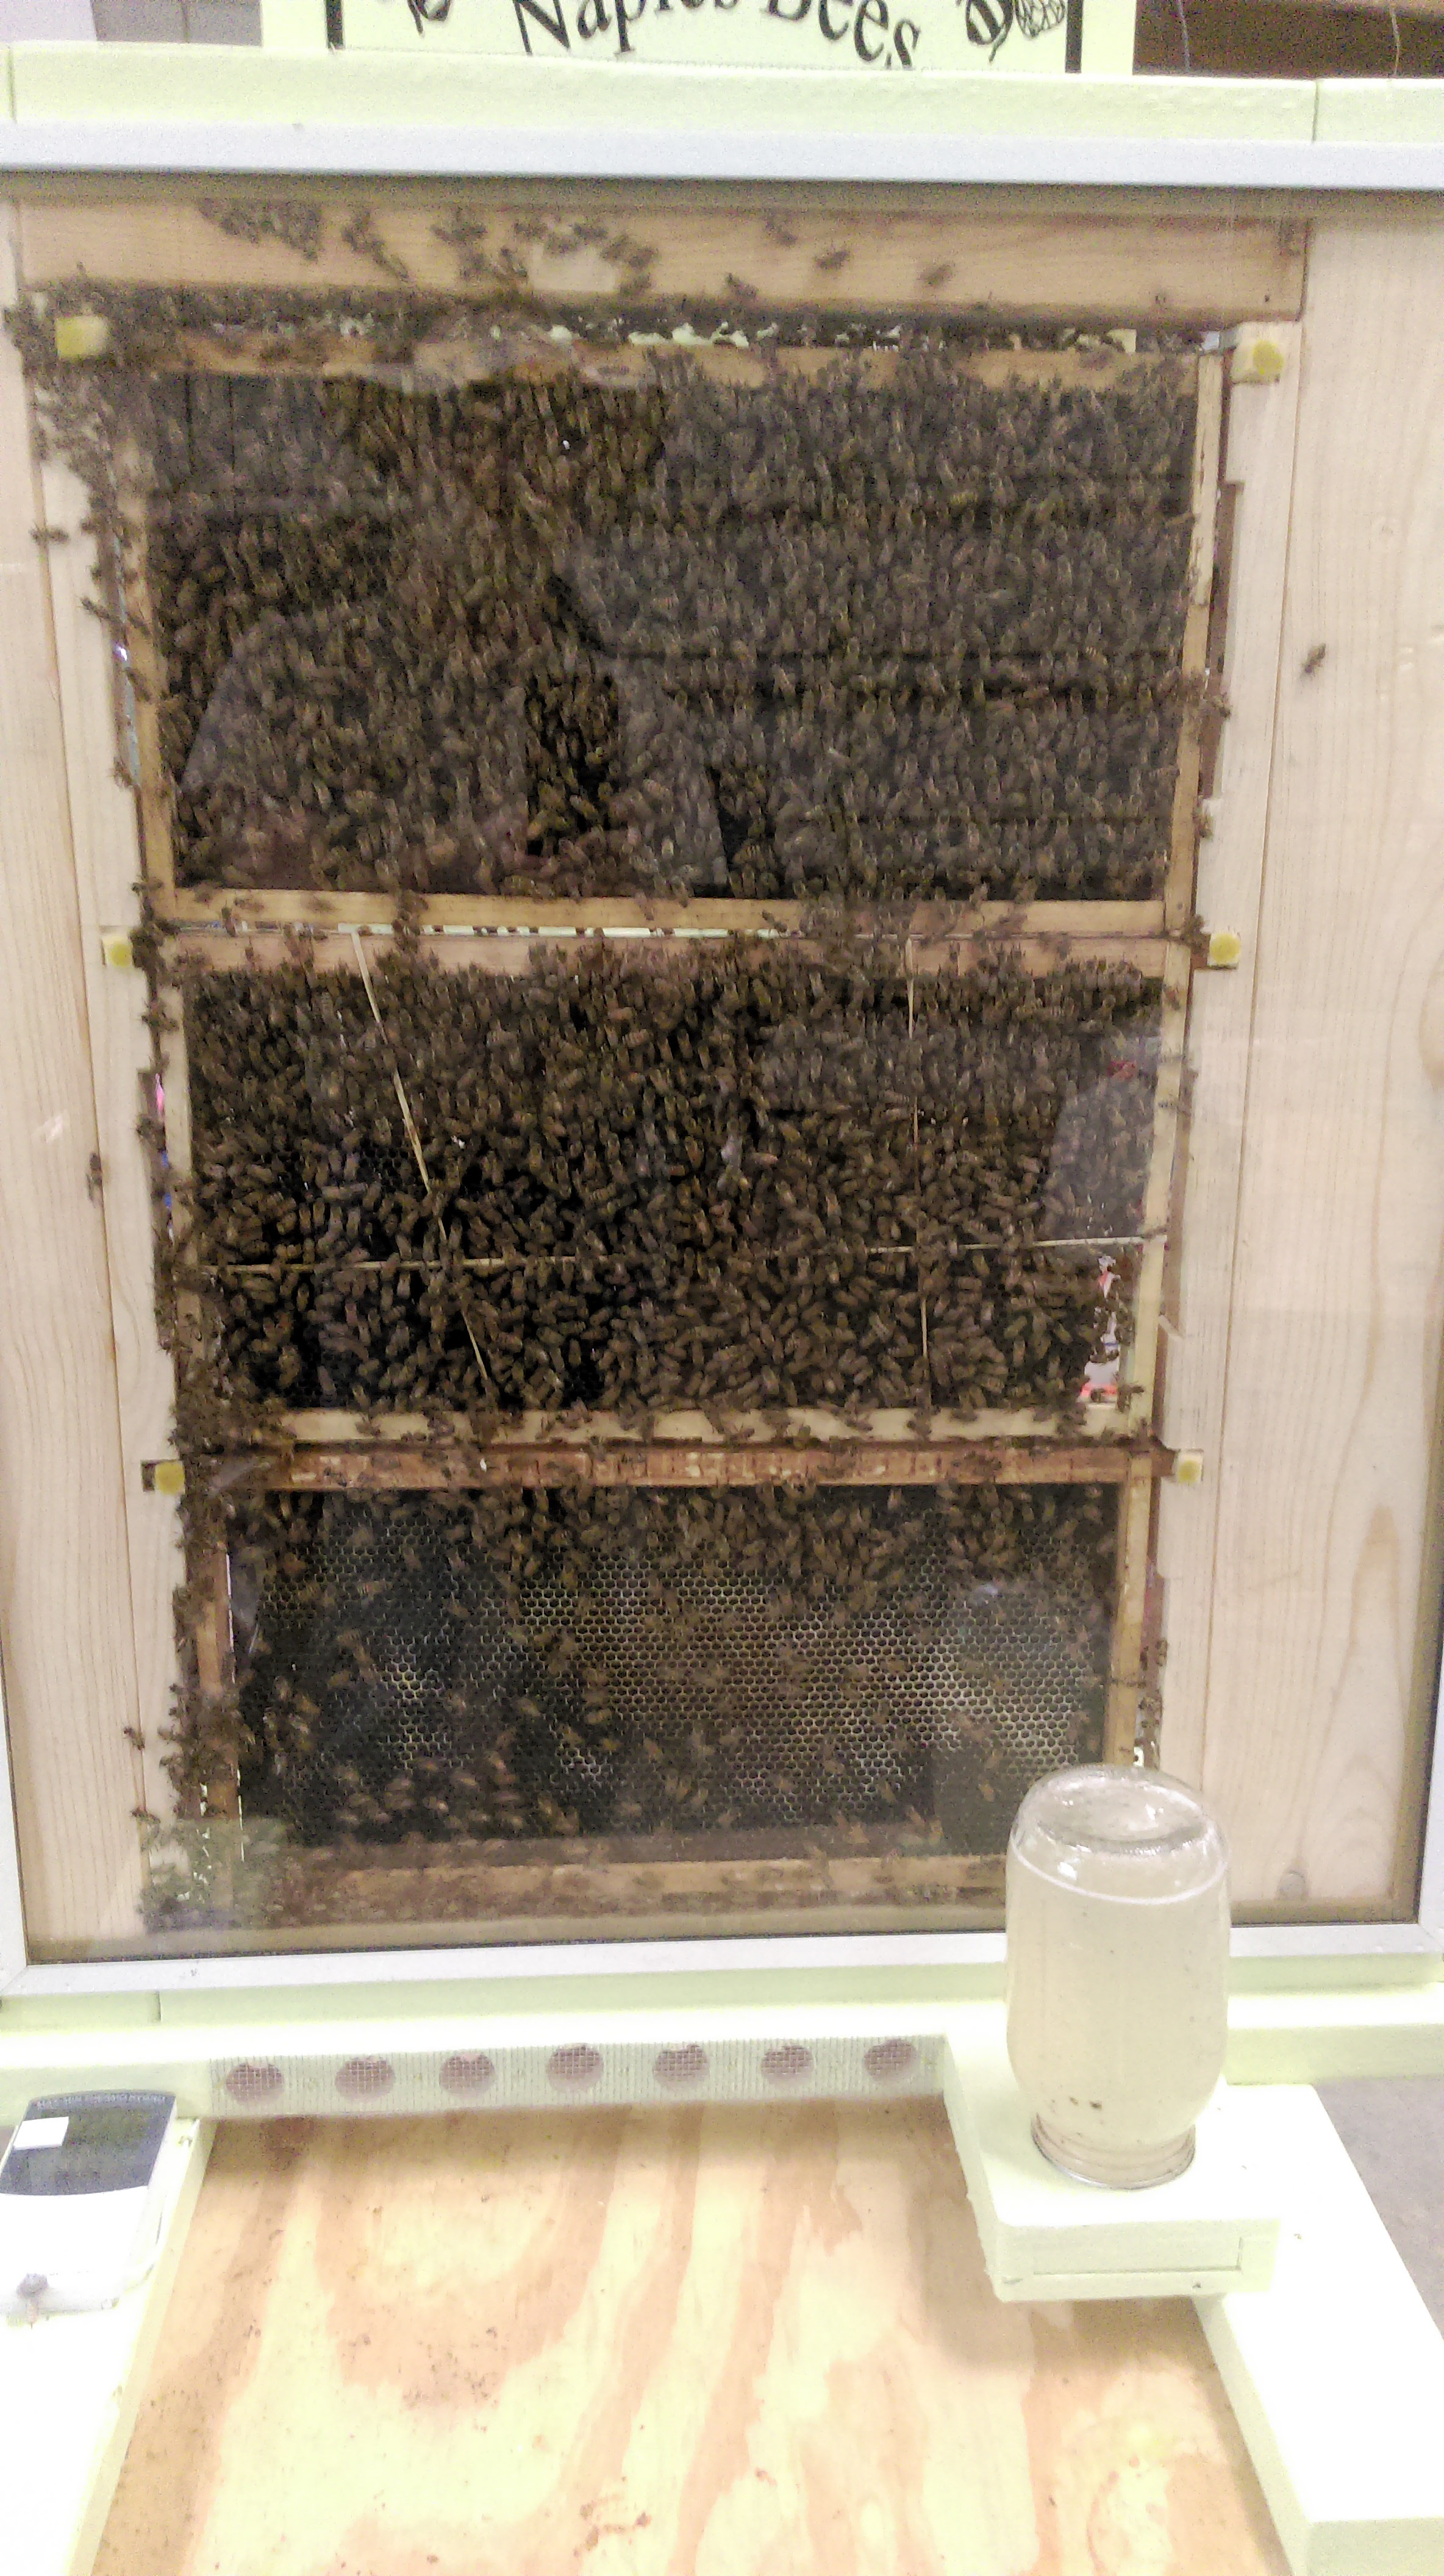
3/3/2018– Observation Hive: A new project of making an observation hive has been completed. An observation hive is something every hobby beekeeper will want at some point. My project started with coming across some nice junk glass pieces that originally were part of some kind of door. They made nice front and back windows for a stacked 3 brood frame size display. The wood frame was made from scrap wood with ventilation holes at the bottom and top and a built in sugar water feeder. Exterior and interior temperatures are digitally monitored in order to help make sure the bees are not overheating. We have used it for several southwest Florida display events and it is always a big hit.
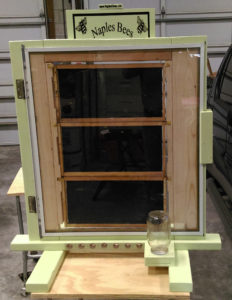 Observation hive has glass on the front and rear with the front glass hinged to swing open in order to load/unload 3 brood frames. Click on picture for a larger view. |
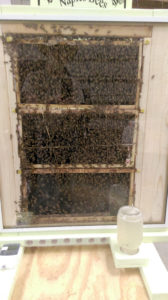 The Observation hive with 3 frames from a recent swarm capture. The bees went right for the feeder! Click on for a larger view. |
2/29/2016– Bee Suit: Working the beeyard in the southwest Florida summer heat has been brutal over the last few years. I even experimented with installing multiple muffin fans in a suit trying to force airflow through the suit, but results were disappointing. I recently took the plunge and decided to try something that I have seen advertised as a “ventilated” bee suit. It arrived the other day and after a few uses, I think it is going to be a big improvement over the normal full bee suit I have always worn. Maybe the cost can only be justified if you are heavy into the hobby (aka addicted), but here is the link to the one I bought. As those that actually do real world things would say….. you need the right tool for the job!! I have used it during our apiary work and several recent hive removals and it is such a pleasure compared to the normal bee suit, especially when you are in a suit for several hours at a time.
|
| |
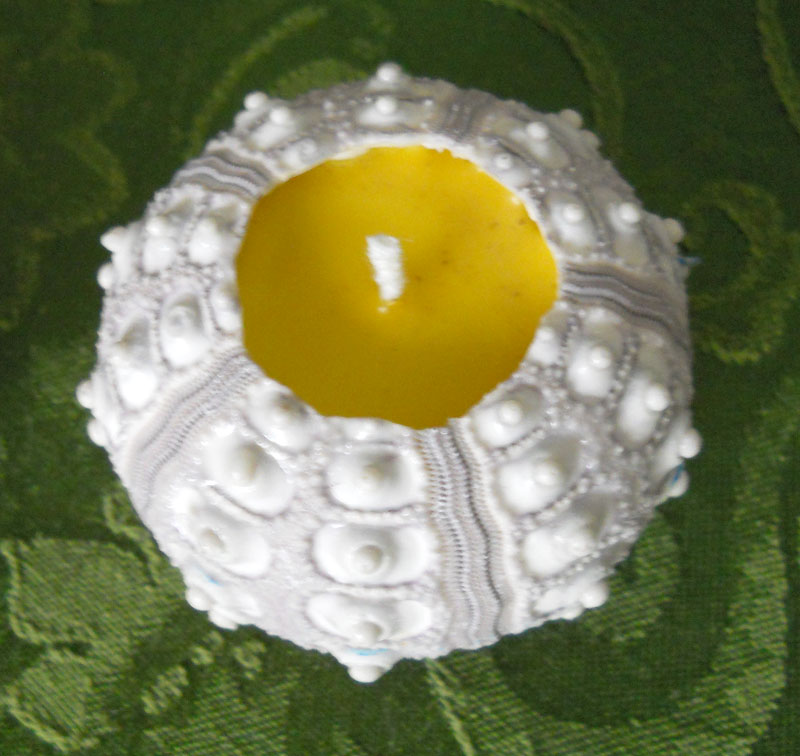
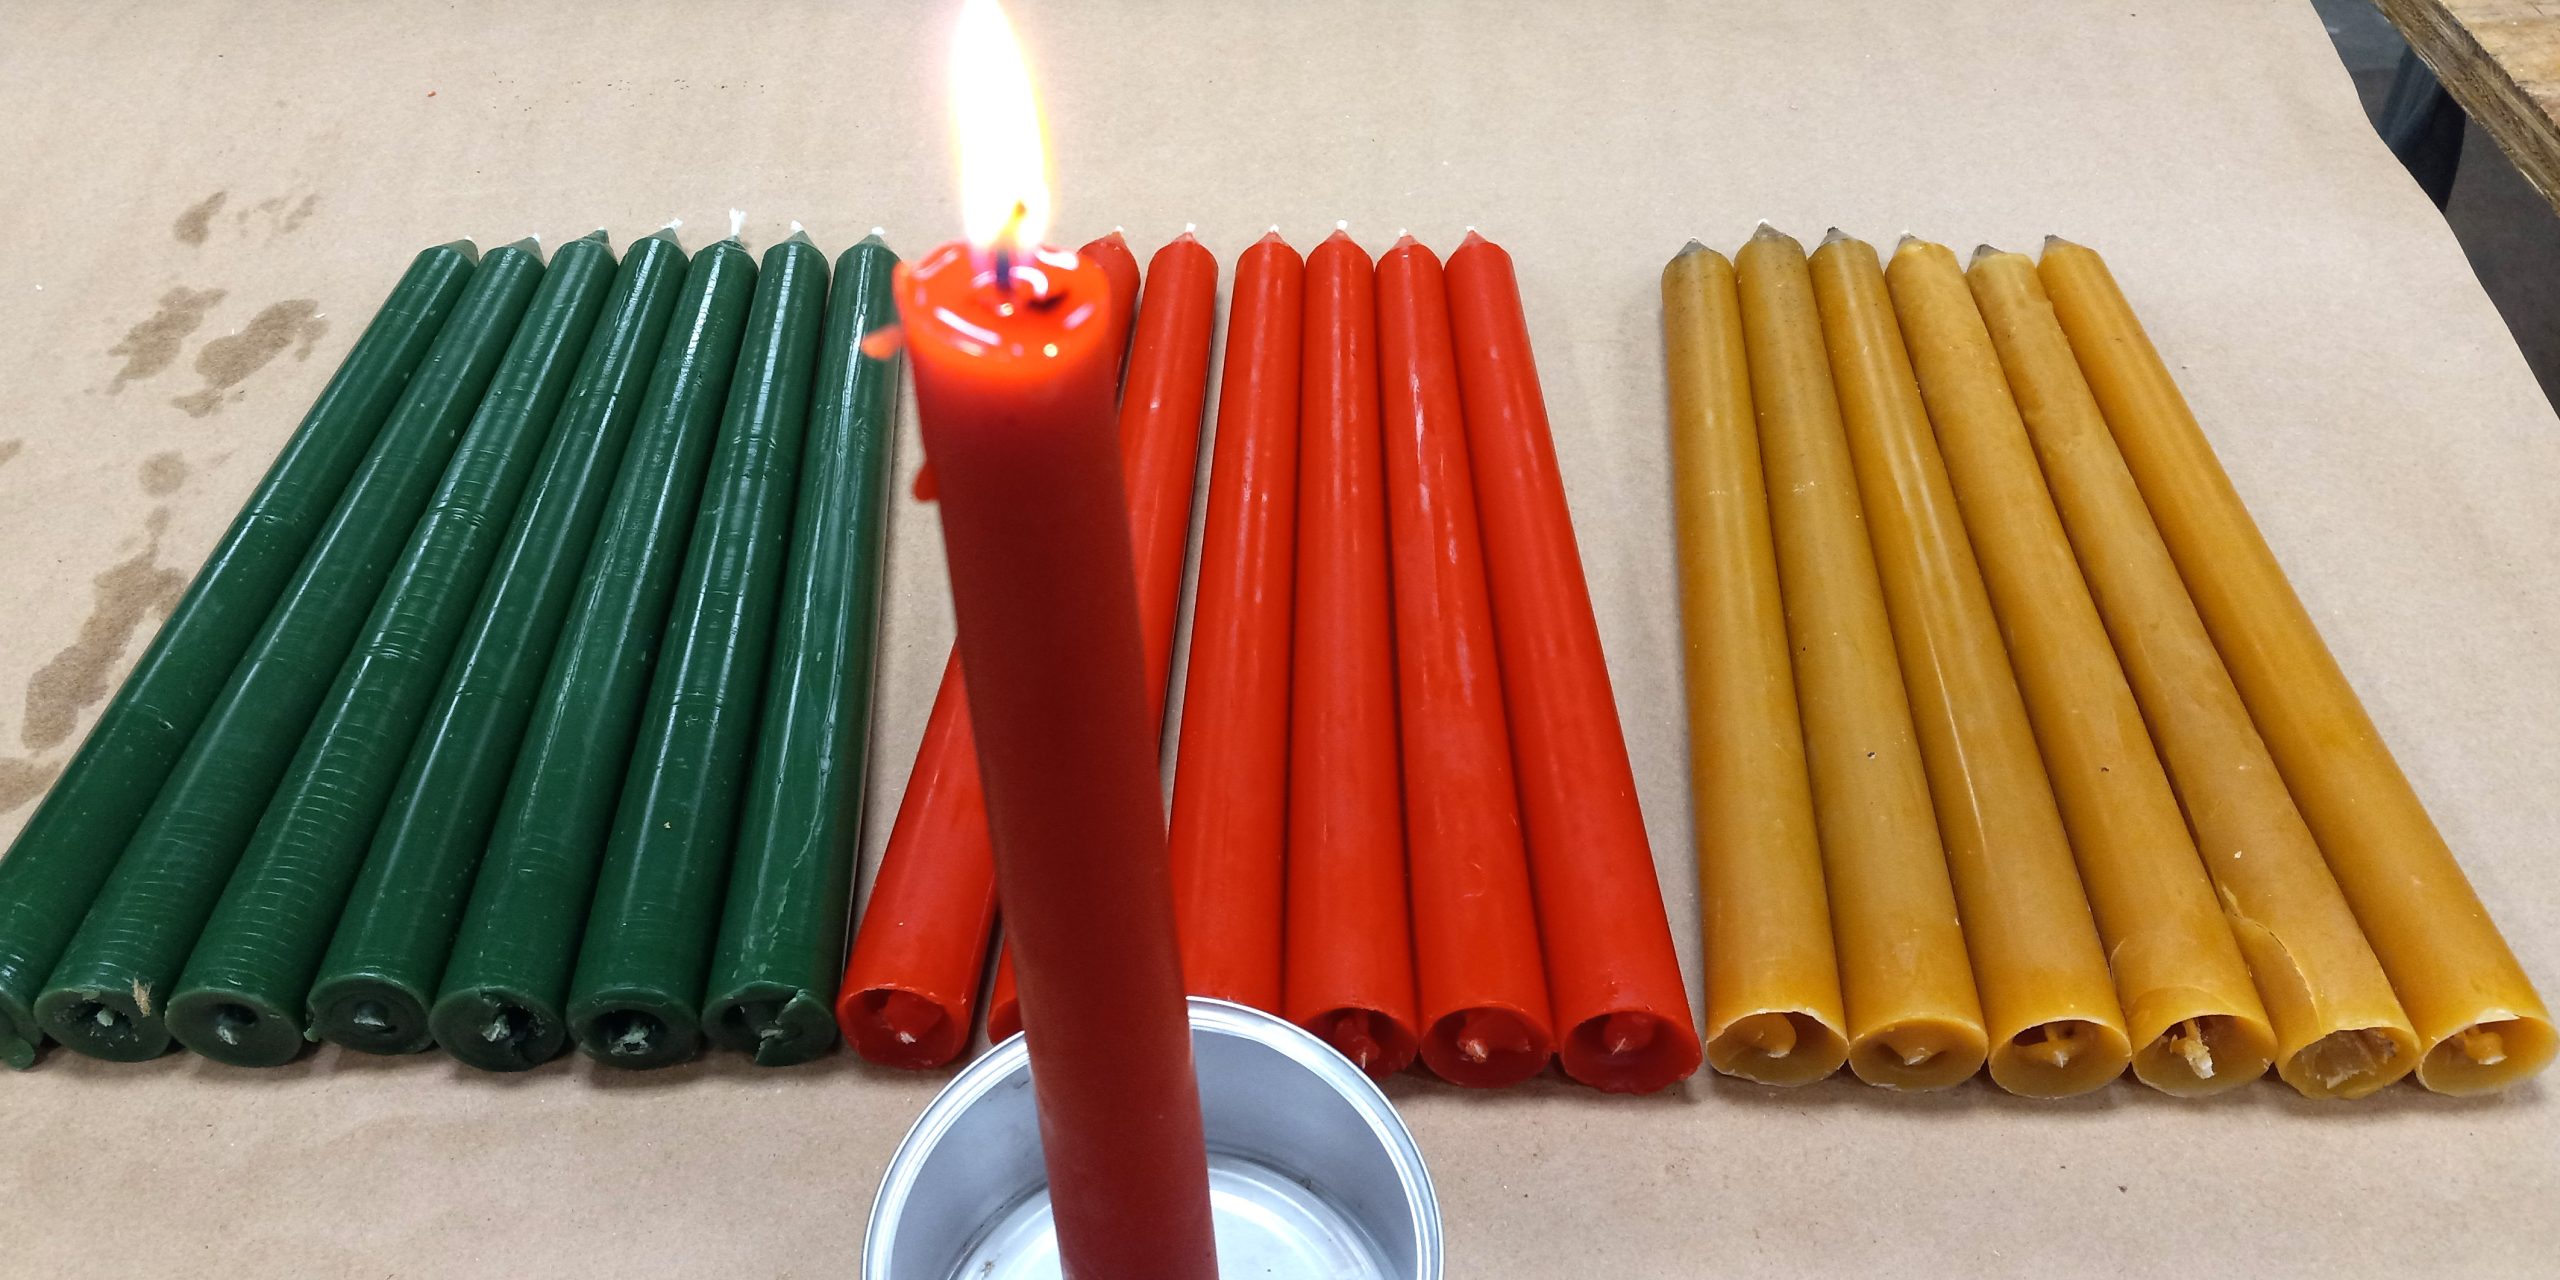
12/19/2015– Candle Making: We did a little candle making the last few days after getting ahold of a couple molds. For fun, we also purchased some candle die to try our hand at adding a little Christmas color to our candles. The natural color of the bees wax is shown in the yellow tinted candle. Click on a picture for a larger view.
Update 3/11/2026: Here is an interesting article that puts in perspective why that emphasizes why in may not be a good choice to burn non beeswax candles in your home |
|
|
| |
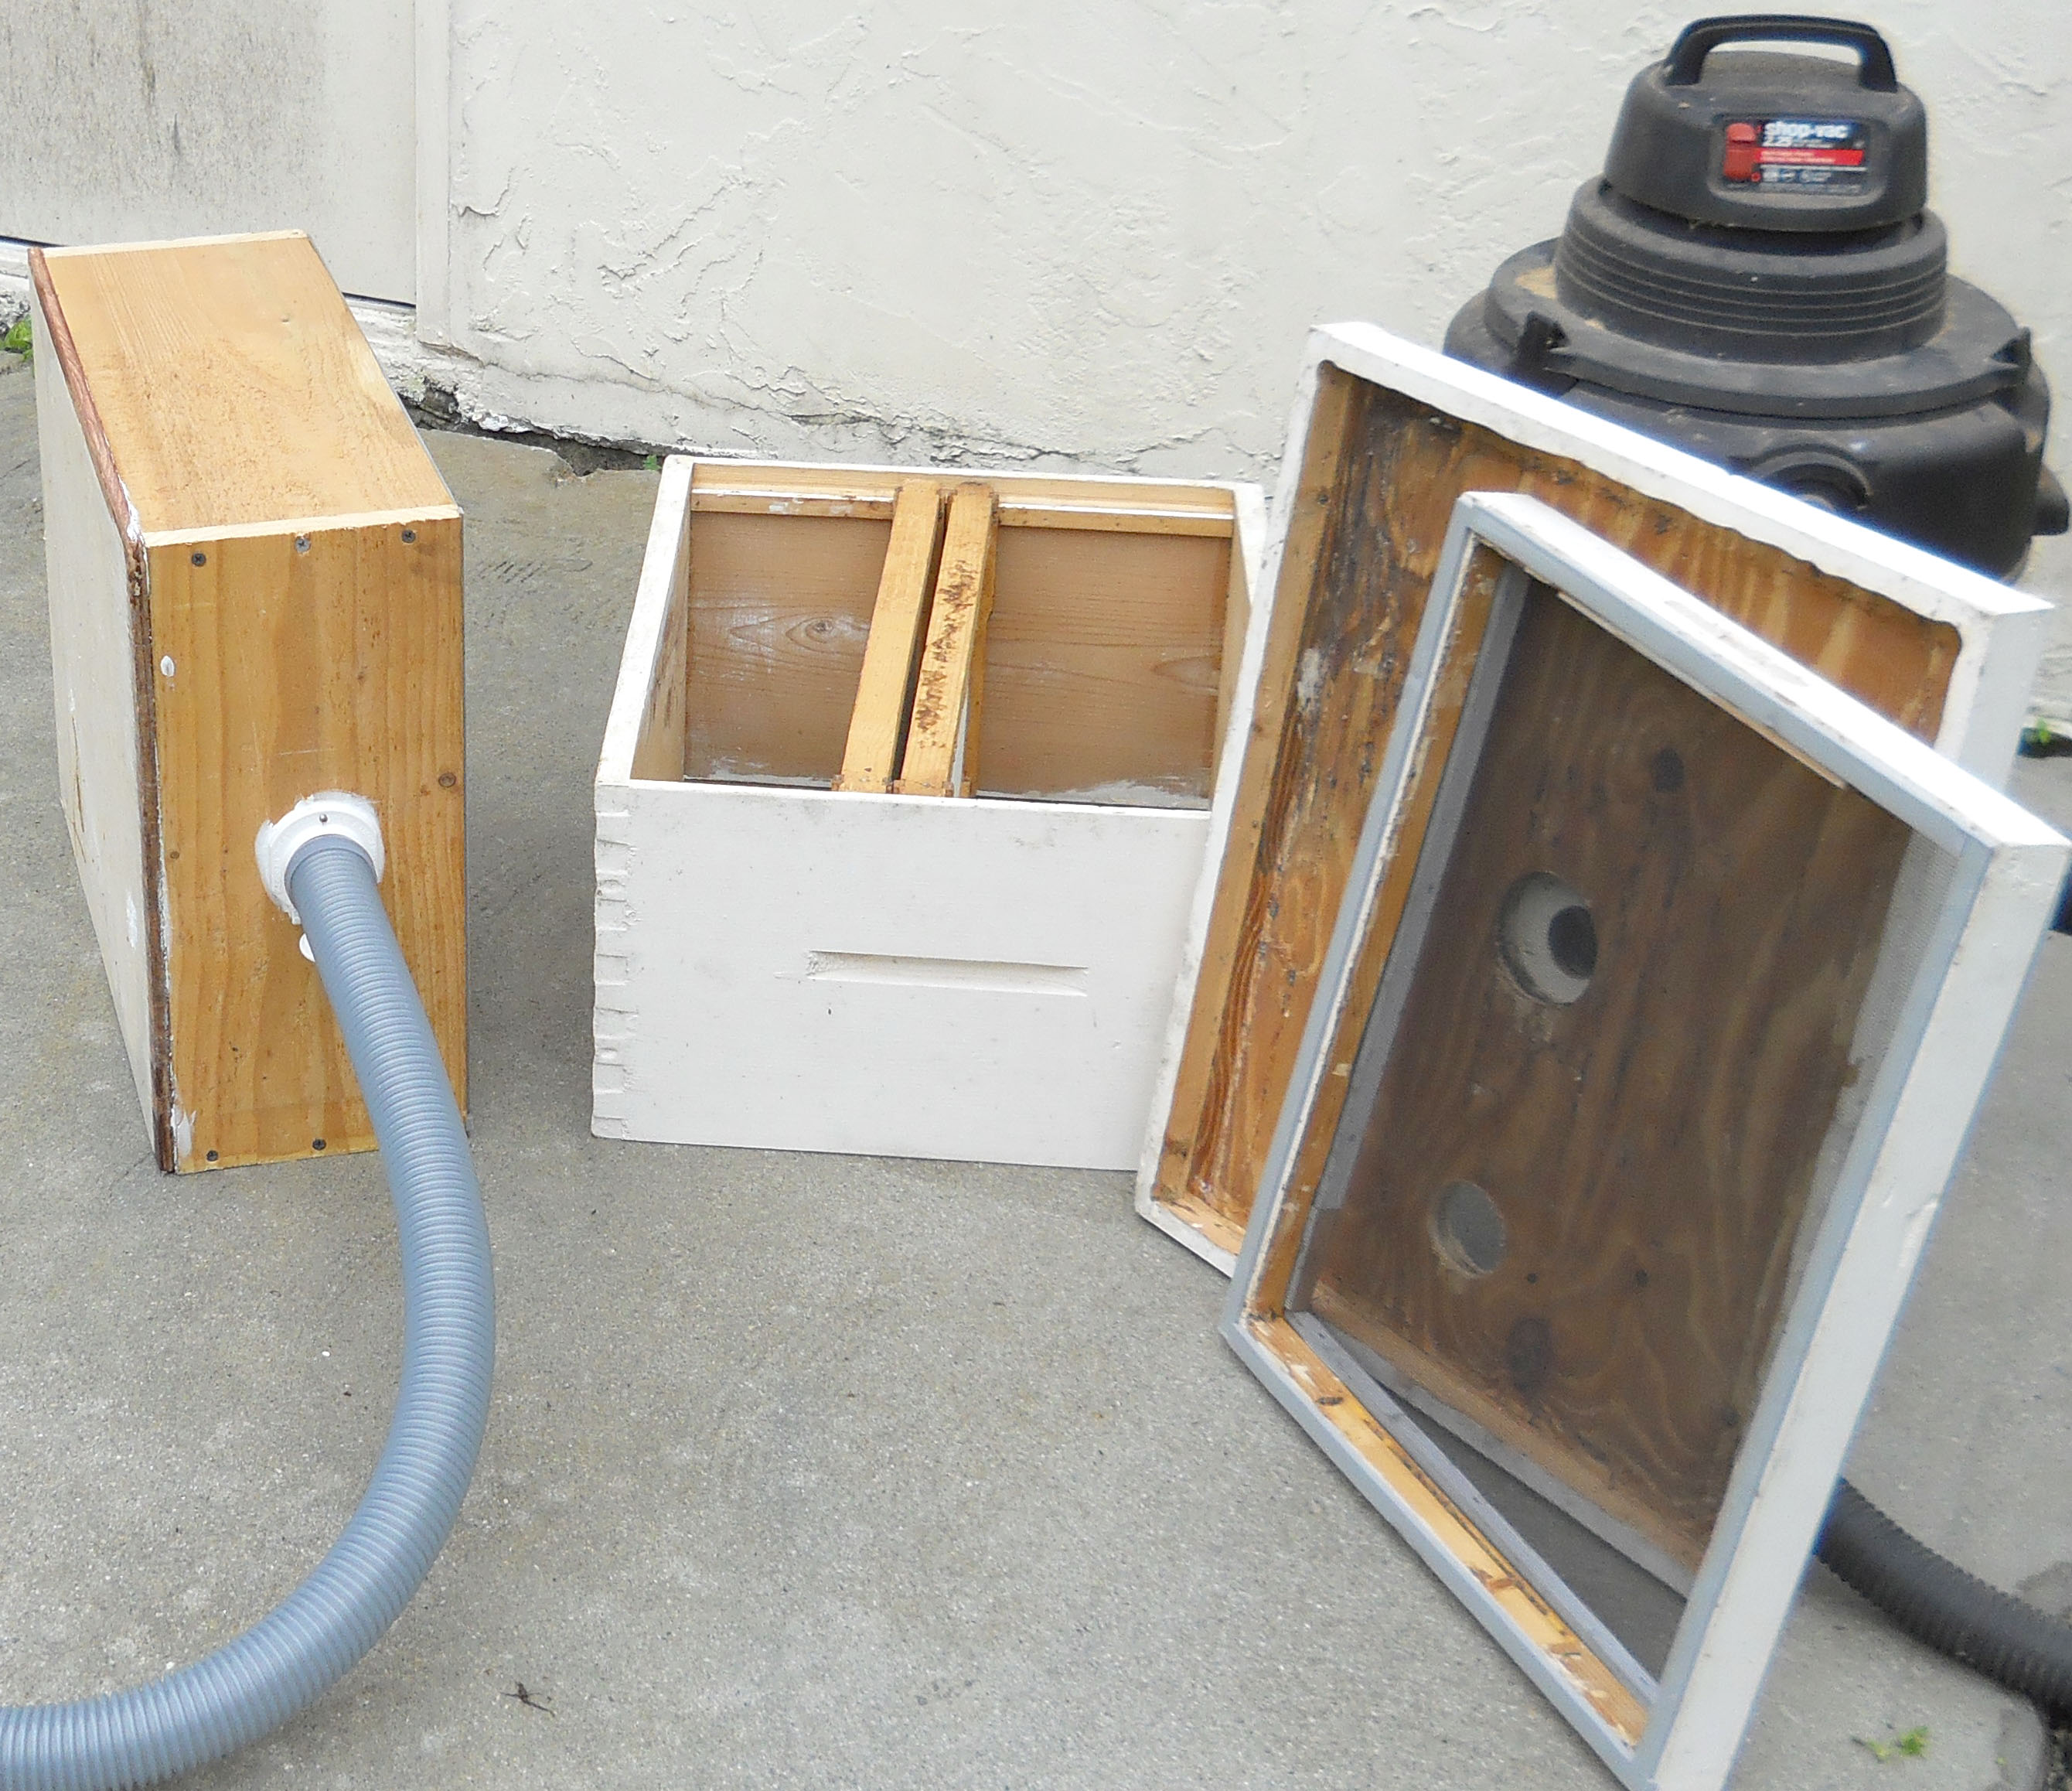
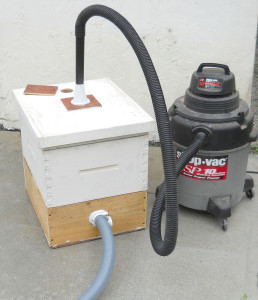
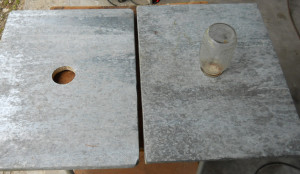
11/22/2015– Bee Vac: It has become apparent that in order to be more successful at getting swarms, a bee vac was needed. To that end, we constructed a simple bee vac that will vacuum the bees into a brood box. It consists of a bottom vacuum inlet chamber positioned below the brood box, a screened top board above the brood box and a vacuum control top cover above the screen board. Although more involved to make, by using a brood box bee vac design instead of the more commonly seen bucket bee vac design, movement to the apiary is less disruptive to the bees since they can remain in the brood box home permanently. Not shown is an additional sliding screen board to separate two brood boxes to facilitate a possible need to have the bees move from the initial capture brood box to a brood box with their natural built comb. Over time this has been shown to be almost mandatory, because the captured bees do much better if they can be introduced back in to their original comb once their original hive built comb has been cut and fitted to frames that go in this top most brood box.
|
|
|
| |
|
10/14/2015– – Honeycomb Press: Today we used our homemade honeycomb press for the small harvest of one super of honey. Previously, we had been crushing the comb with plastic gloved hands, which was time consuming and not efficient at getting all the honey out of the comb. The press consists of a perforated aluminum bucket (actually a fryer strainer basket) and a homemade frame made out of wood and some scrap chrome bars. By using a small car jack pushing down on a circular piece of wood, the honeycomb can effortlessly be compressed to squeeze out every last bit of golden honey. It is a great tool for the job and fun to watch the golden honey just effortlessly flow into the bucket. Total cost was around $25 which was mostly for the cost of the fryer strainer basket. More details about the construction of the press is here. As of May, 2017, an electric motor has been added to the jack operation on the press.
|
|
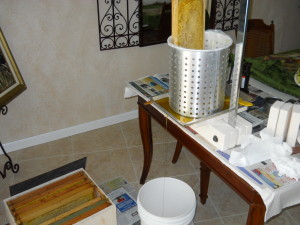 Click on a picture for a larger view. The jack pushes down on a spacer block on top of a circular piece of wood that fits snugly in the strainer. Advancing the car jack squeezes the comb with the ability to hold the pressure which allows time for the honey to ooze out of the comb. The end result is a cake of almost solid wax with very little honey residue. Click on a picture for a larger view. The jack pushes down on a spacer block on top of a circular piece of wood that fits snugly in the strainer. Advancing the car jack squeezes the comb with the ability to hold the pressure which allows time for the honey to ooze out of the comb. The end result is a cake of almost solid wax with very little honey residue.
|
 |
|
|
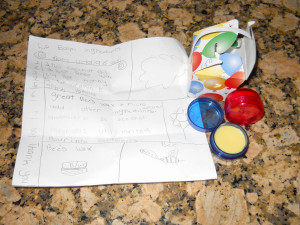
10/3/2015– Victoria’s Lip Balm — We received an awesome gift from someone we met along the way in this beekeeping adventure. Victoria and her Mom, Vicki, brought us a sample of their homemade recipe for lip balm using some wax harvested from our honey gathering process. Victoria, who is 8 years old and in the 3rd grade made the lip balm as part of an educational project. She included a detail recipe note. We’ve all tried it and it is fantastic, and, just like the honey, better than anything you can buy at the store. Thank you, Victoria !!
Click on the below picture for a full size view:
|
 |
|
6/5/2015– In an effort to improve the tops so they stand up better to the rainy weather, I started to cover the plywood made tops with scrap galvanized tin. The trick to getting it flat on the plywood top was to use liquid nails and then turn it upside down on the concrete floor and roll my truck tire on it and leave overnight…….it makes everything flat and glued, and then just fold over and staple along the bottom edge.
|
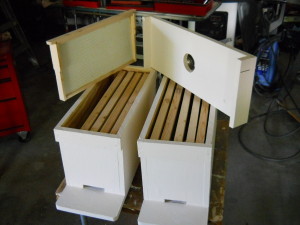
3/20/2015– Donated scrap 1X12 lumber was used to make four more finger joint brood boxes and a few top entrances to experiment with. 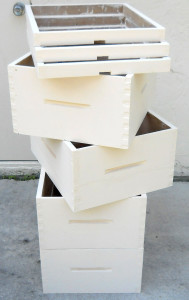 |
Gearing up for the spring 2015 season, here are the homemade hives recently built that are ready for the apiary. We made four complete 10 frame langstroth hives consisting of an oil pan screened bottom board, brood box, super box, and feeder top, populated with appropriate plastic foundation wood frames. A couple previously made starter nuc hives are also shown. Everything was made from scrap wood. 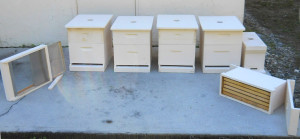 |
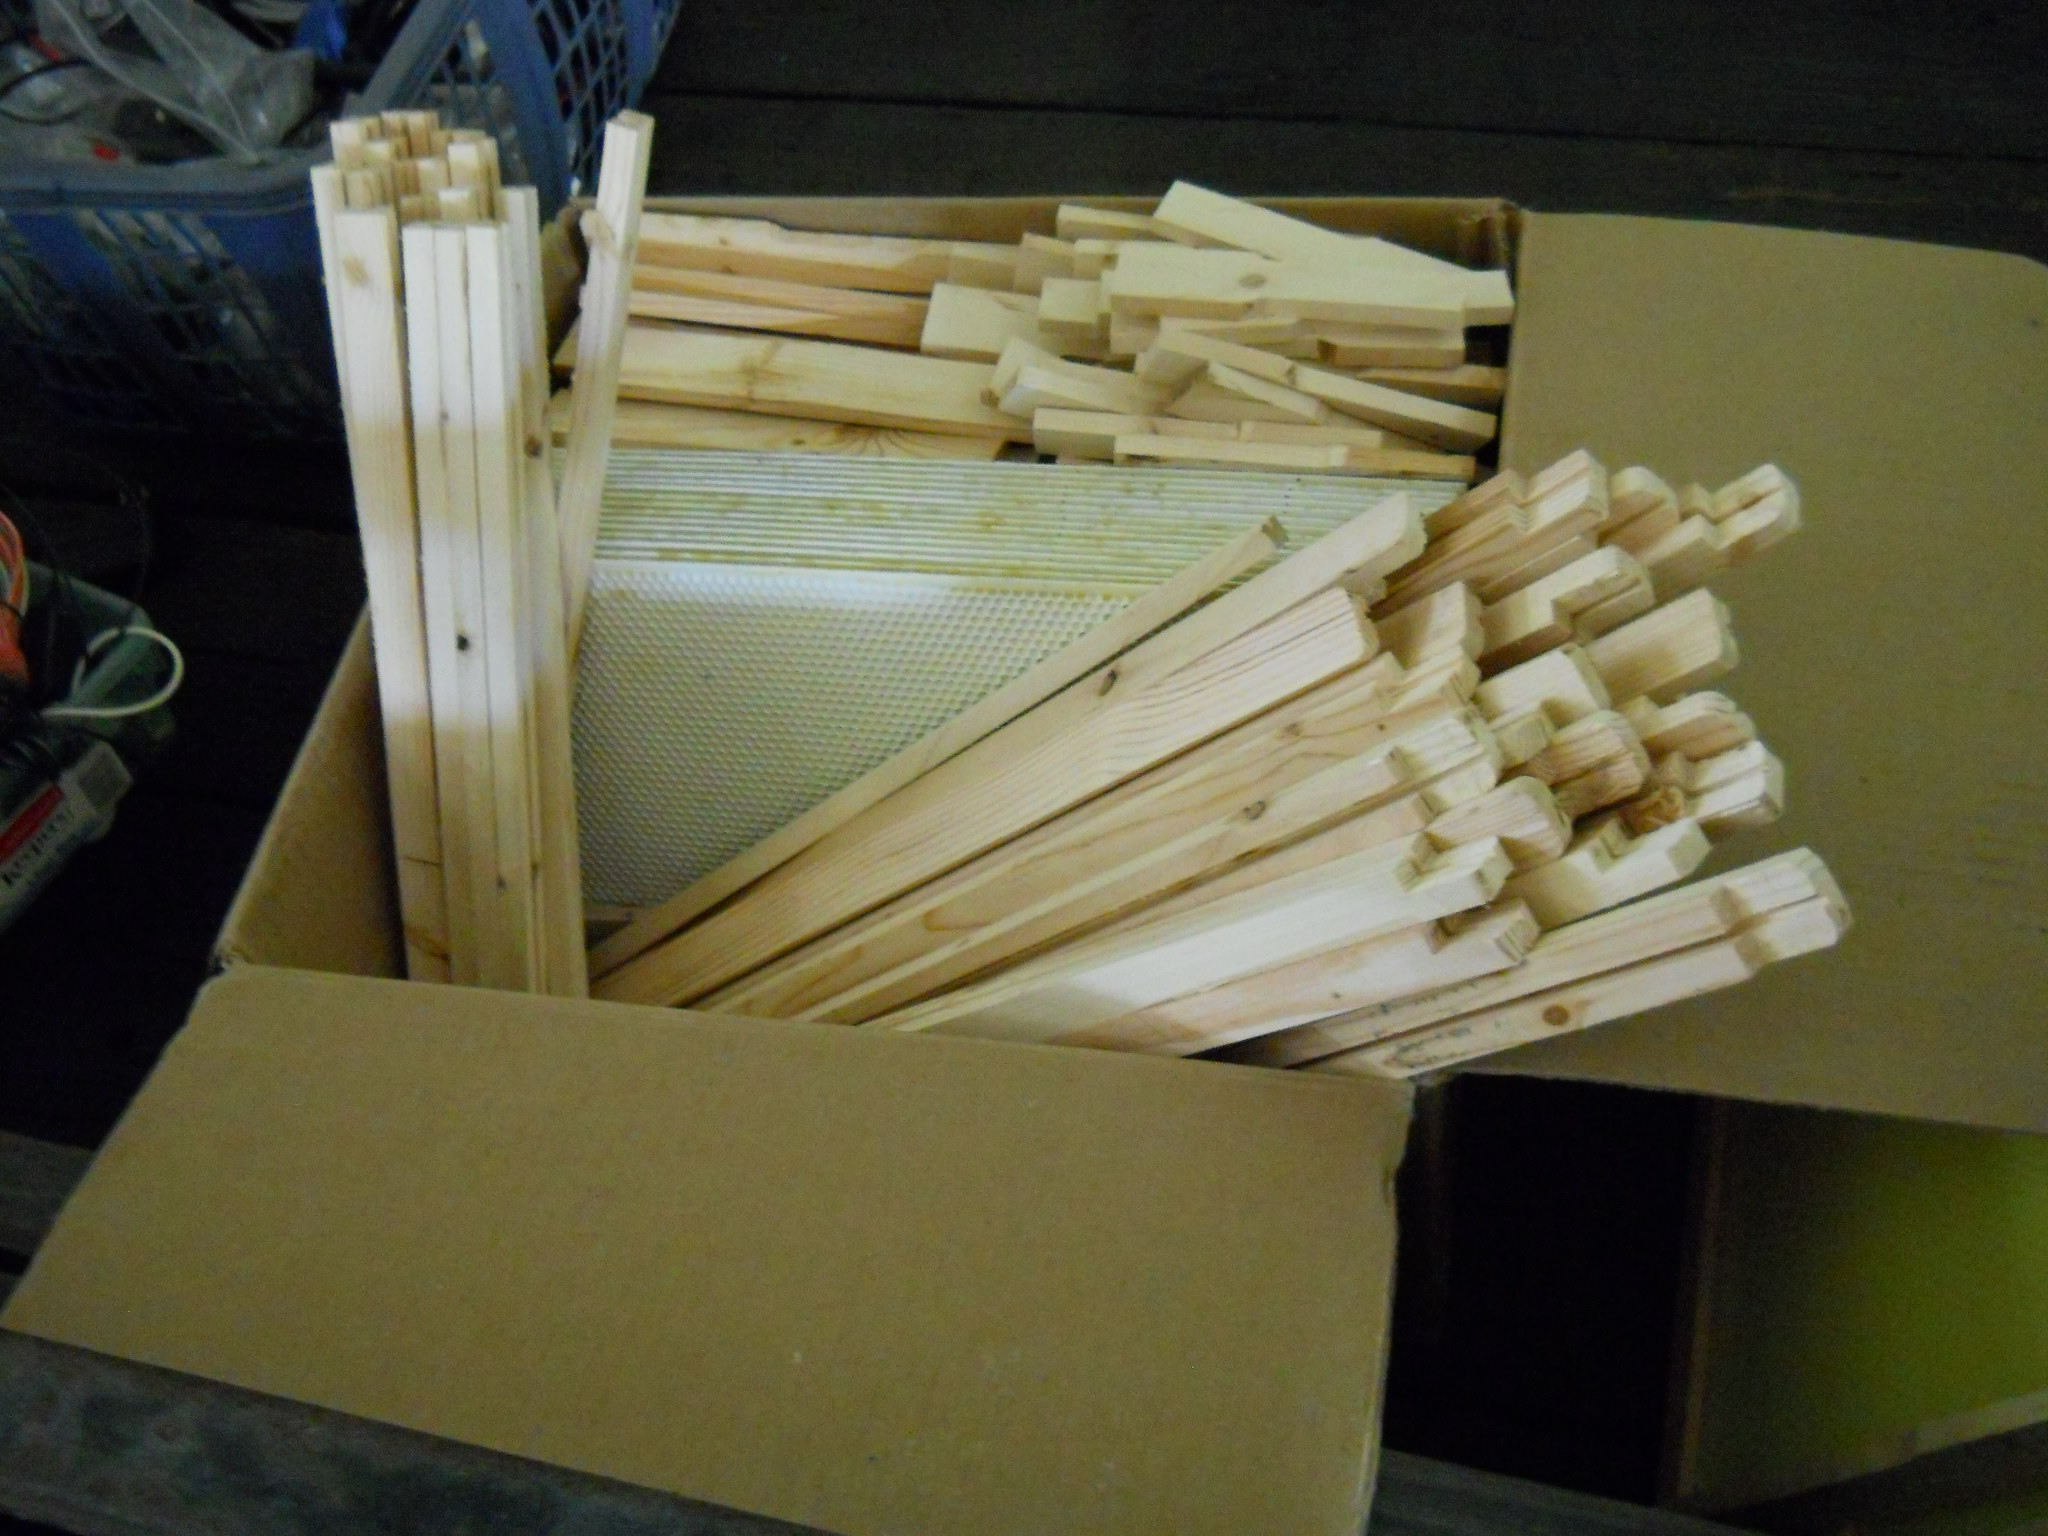
| More Details: Here are some of the custom made hive and hive accessories we made for our use in our local wood working shop. Click on the pictures for full size image. Wooden frame pieces made and yet to be assembled |
 |
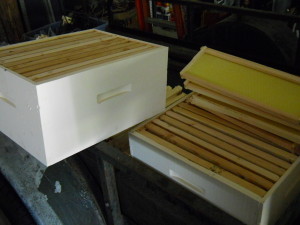 brood and super hive boxes with frames….. ready to go as the bee population grows |
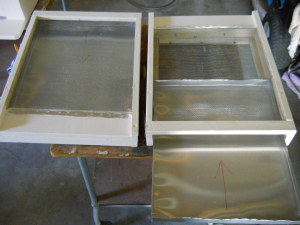 bottom boards (what the hive box sits on the stand with) with screened bottom and beetle trap oil trays
|
 nuc hives with feeder top (starter hive for raising a new queen) with assembled frames
|
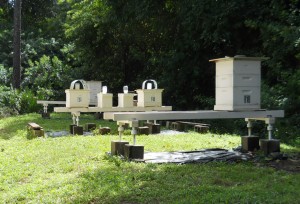 An early picture of the hives apiary with the anti ant beehive stands we made. The ants crawl up the pipe but can’t get past the bells. The little bells on each leg are heavily coated on the inside with wheel bearing grease. The quart jars on some of the younger hives are there to feed sugar water and supplements. |
The ultimate beehive stand. Nothing can crawl up the legs into the hive and it is easy to maintain in a rainy south Florida. 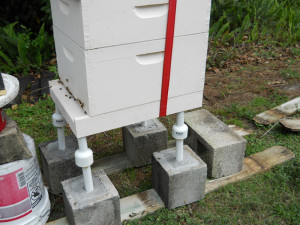 |
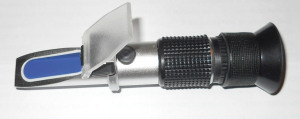 Using a handheld refractometer allows the moisture content of the honey to be determined accurately before harvesting. Ideally we want to see 18% or less moisture content. |
|